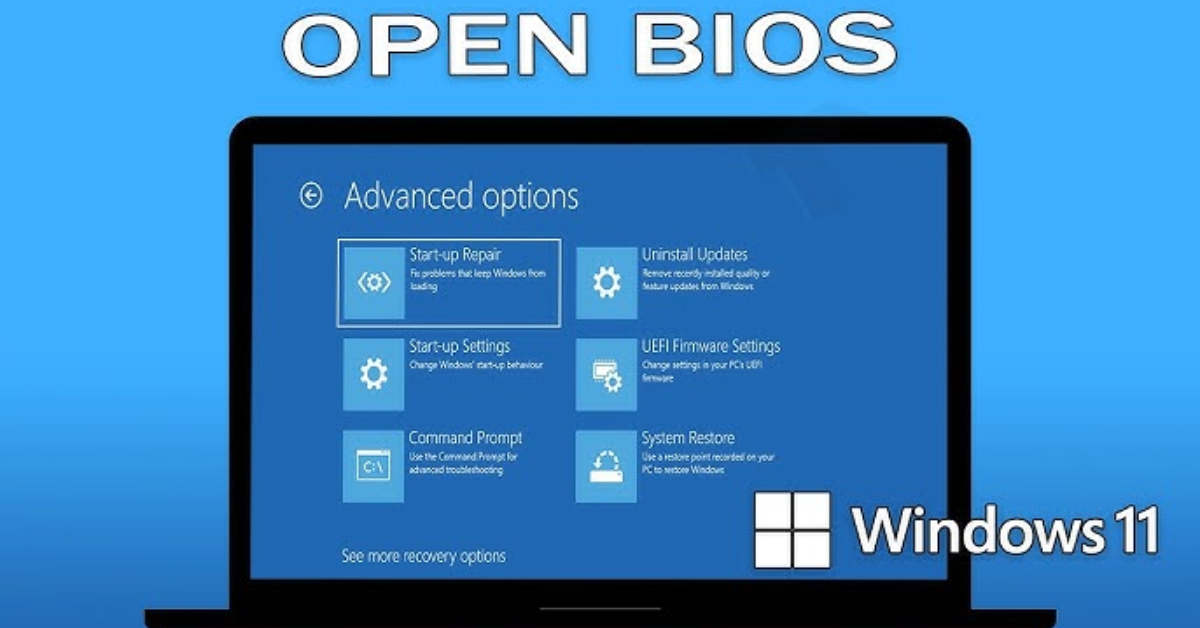
Accessing the BIOS (Basic Input/Output System) on your Windows 11 device is essential for configuring hardware settings, managing boot options, and troubleshooting system issues. While the process may vary slightly based on the manufacturer of your computer or motherboard, this article will provide a comprehensive guide to accessing the BIOS on Windows 11.
Understanding BIOS
The BIOS is firmware that initializes and tests your computer’s hardware during the booting process. It provides a runtime environment for the operating system and enables you to configure hardware settings such as boot order, system clocks, and more. Accessing the BIOS can be crucial for advanced troubleshooting, overclocking, or installing a new operating system.
Methods to Access BIOS on Windows 11
There are several methods to access the BIOS, and each method is dependent on your device’s manufacturer. Here are the most common methods:
Method 1: Using the Settings App
- Open Settings:
- Click on the Start menu and select the Settings icon (gear symbol), or press Windows + I on your keyboard.
- Navigate to System:
- In the Settings window, click on System in the left sidebar.
- Go to Recovery:
- Scroll down and select Recovery.
- Advanced Startup:
- Under the Advanced startup section, click on Restart now. This will prompt your PC to restart and take you to the Windows Recovery Environment (WinRE).
- Troubleshoot Options:
- Once in WinRE, select Troubleshoot.
- Advanced Options:
- Click on Advanced options.
- UEFI Firmware Settings:
- Select UEFI Firmware Settings and click Restart. This will reboot your computer directly into the BIOS.
Method 2: Using a Keyboard Shortcut During Boot
This method involves using specific keys during the boot process. The exact key depends on your computer’s manufacturer:
- Acer: Press F2 or Del as soon as you see the Acer logo.
- ASUS: Press F2 or Del right after powering on the computer.
- Dell: Press F2 or F12 immediately after you power on.
- HP: Press Esc or F10 right after turning on your device.
- Lenovo: Press F1 or F2 when the Lenovo logo appears.
- MSI: Press Del during the boot process.
- Toshiba: Press F2 immediately after turning on.
Note: It’s important to tap the key repeatedly as the computer starts up to ensure that you don’t miss the brief window of opportunity to enter the BIOS.
Method 3: Using the Command Prompt
You can also access the BIOS using the Command Prompt. Here’s how:
- Open Command Prompt:
- Search for Command Prompt in the Start menu, right-click it, and select Run as administrator.
- Enter the Command:
- Type the following command and press Enter:
shell
Copy code
shutdown /r /o /f /t 00
- This command will restart your PC and take you to the Windows Recovery Environment.
- Follow the Steps Above:
- Follow the same steps as in Method 1 from the Windows Recovery Environment to access BIOS.
Things to Consider
- Saving Changes: Once you are in the BIOS, you can navigate using your keyboard. Make sure to save any changes before exiting the BIOS setup.
- BIOS vs. UEFI: Modern systems often use UEFI (Unified Extensible Firmware Interface) instead of traditional BIOS. The steps to access UEFI are similar but may have additional features.
- Backup Data: Before making any changes in BIOS, ensure you have backed up your important data to prevent any accidental loss.


Leave a Reply